By Dylan Murphy
How to Start Snowshoeing
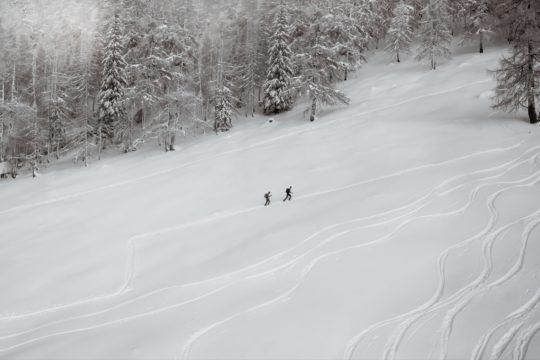
If you are looking for a new activity you can engage in during wintertime, then look no further than snowshoeing. Snowshoeing is easy to do and learn, affordable, and can even be an excellent workout for you.
Here are the basic steps you can follow to start snowshoeing:
How to Start Snowshoeing
- Prepare your snowshoeing gear. These include your snowshoes, snowshoeing boots and socks, trekking poles, and snowshoeing gaiters.
- Wear layered clothing so you can easily adjust to changing weather conditions. Also, consider other coverings like gloves, hats, and balaclavas.
- Make sure your backpack contains the Ten Essentials so you can be prepared for any emergencies.
- Look up suitable areas for your snowshoeing adventures. These include local hiking trails, national parks and forests, and ski resorts.
- Practice snowshoeing on flat terrain so you can get a good feel of what the activity will be like.
This guide will show you the essential gear you will need to snowshoe, including the Ten Essentials.
You will also learn some basic techniques and handy tips that can help give you a safer and more fun snowshoeing experience.
Pros of Snowshoeing
Some of the activities you regularly engage in during other seasons might get limited during winter because of the snow, which might leave you wondering what you can do in the meantime. Snowshoeing is not only an excellent alternative to get you moving about but also has a lot of benefits to offer. The following are some of these benefits:
Snowshoeing is very easy to do.
You don’t need to learn any complicated techniques to be able to snowshoe. Snowshoeing is almost like hiking, but on the snowy ground and with snowshoes instead of your regular footwear. You might need to learn how to snowshoe up or down a hill and use trekking poles, but these are easy enough for anyone looking to go snowshoeing.
Snowshoeing is affordable.
Winter activities such as snowboarding and skiing can be a bit costly. Not only do you have to buy the necessary gear, but you also have to pay for other expenses such as lift tickets or passes. These expenses can be costly and might limit your enjoyment of such activities to the times when you can only afford them.
With snowshoeing, you won’t have to worry about such kinds of expenses. All you need are a good pair of snowshoes, snow boots, and the right clothes, and you’re good to go.
Snowshoeing is an excellent workout activity for the winter season.
Many activities might not be available during the winter season that you might otherwise be able to do during the rest of the year. As such, you might be worrying about what you can do to stay active in the wintertime. Fortunately, snowshoeing is an excellent alternative.
Moving in the snow takes more effort than how you would typically walk, run, or hike. Because both your lungs and heart are put to work much more than usual, they become strengthened and more developed as a result.
Also, almost all of the muscles in your body get engaged: from your arms when you use trekking poles; to your core, as it works to help you maintain your balance while you hike; and to your legs that take step by effortful step, especially in deep powder. Snowshoeing truly gives you the workout you need for this time of the year.
Snowshoeing brings different kinds of people together.
As more and more people are looking for activities to engage in during the winter season, snowshoeing can be an opportunity to connect with others. And because snowshoeing isn’t restricted to any particular age group, you can make friends ranging from kids to the elderly. Snowshoeing does bring all kinds of people together.
Snowshoeing lets you explore and appreciate a new landscape.
Snowshoeing allows you to explore a much different landscape than what you are usually used to. The winter scenery can only be fully appreciated if you’re outdoors, and snowshoeing helps you get into that setting.
For example, you can cross frozen streams to explore what’s on the other side, and you can observe the wildlife that only comes out during this time of the year. The snow also introduces you to new trails you can traverse, which would otherwise not be available in other seasons.
Snowshoeing also lets you immerse yourself in the quiet of your surroundings and can be a meditative experience as well.
How to Start Snowshoeing
There are a couple of things that you should prepare so you can start snowshoeing. Still, these are mostly related to your snowshoeing gear, along with learning some basic snowshoeing techniques.
Snowshoeing Gear
Snowshoes
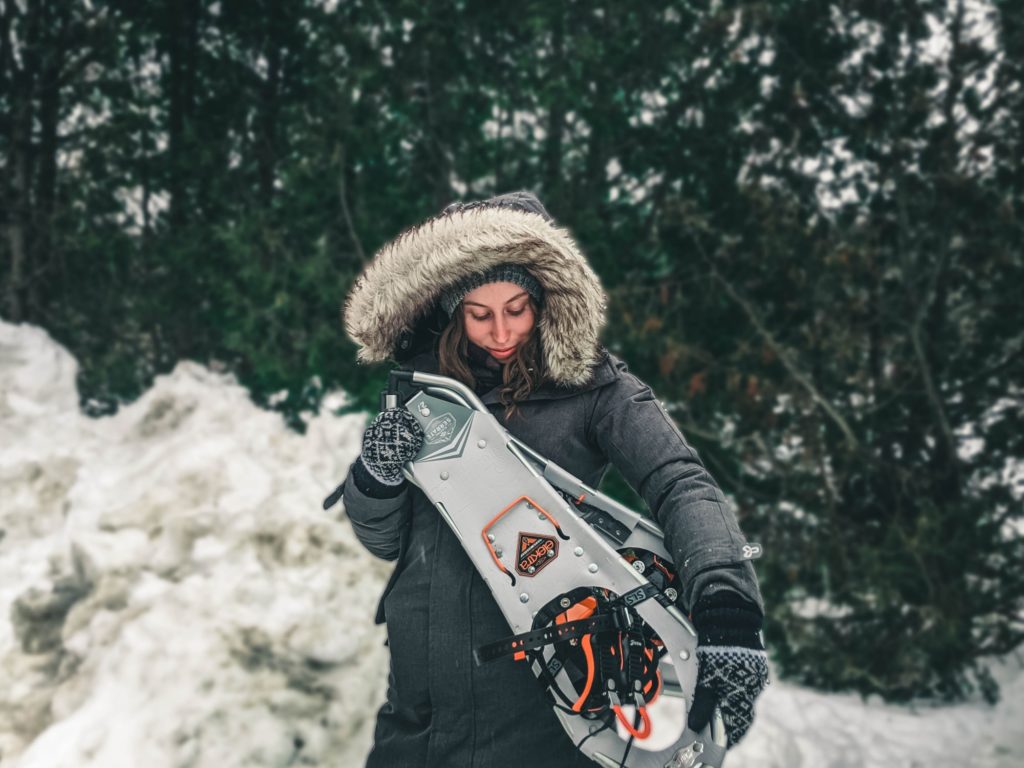
Of course, you can’t go snowshoeing without your most essential gear – a pair of snowshoes. Snowshoes are what allow you to move around in the snow quickly and keep you afloat on deep powder or from slipping on icy terrain. What makes an excellent pair of snowshoes depends on your needs. However, some primary factors are usually taken into consideration when choosing a couple.
The type of snowshoe is one such consideration. Trail or recreational snowshoes are suited for relatively flat terrain and so are very beginner-friendly. If you want larger-sized snowshoes that offer better grip and flotation on deeper snow, then you can go with a backcountry type. Backcountry snowshoes also usually come with heel lifts which can help reduce fatigue in your calves when climbing uphill.
Another factor to consider is the decking of your snowshoes; the two most common material types are nylon and plastic. Nylon deckings offer more flexibility and durability and usually come with a protective frame, but they are relatively more expensive. Plastic deckings, on the other hand, provide better traction and are frameless and relatively cheaper. However, they are more prone to breaking and are noisier in the snow.
It would be best to look into the traction features offered by the snowshoes you are choosing from. Toe and heel crampons dig into the snow and provide you needed grip; steel ones offer high durability. Frame rails, on the other hand, provide more stable lateral movement. The more traction features your snowshoes have, the better.
You would also want your snowshoes to feel comfortable when you wear them. Check first the length of your snowshoes so they fit your feet properly and aren’t too tight or too oversized. They should also be easy to put on, so look for intuitive binding systems that don’t require complicated set-ups. These include those incorporating single-pull straps (SPL) or dials. Also, look for incorporated padding such as EVA foam that adds cushioning to your feet.
Snowshoeing Boots
Snowshoeing boots are just as essential as snowshoes when it comes to snowshoeing. Snow boots help protect your feet from cold and wet weather and keep snow out.
Look for boots that provide excellent insulation throughout so your whole foot stays warm, including your toes and heel. Your winter boots should also be fully waterproof and not simply water-resistant, so your feet stay dry. Furthermore, features such as EVA or sheepskin footbeds are great to have as they give you added comfort.
Snowshoeing Socks
Having socks suited to snowshoeing can be underrated, even though they are an essential component of your snowshoeing getup. Socks not only give extra insulation for your feet but also offer breathability and help wick away sweat, and provide cushioning for added comfort.
The most significant component of a snowshoeing sock is its material. The best material types are merino wool and synthetic, each having its pros and cons. Merino wool offers better insulation and wicking of moisture, can cancel out odors, and is very soft. However, it is relatively more expensive and can cause problems for those with wool allergies.
On the other hand, synthetic is the relatively more durable and cheaper type. It also retains its shape better than merino wool. A downside to synthetic, though, is that it can get smelly over time.
An important note to consider is that you should avoid getting cotton socks. Cotton absorbs moisture quickly and dries slowly, which can be very bad for your feet as they might get wet and cold.
If you are looking for socks that provide excellent insulation, you should try looking into heated socks. Heated socks come with an integrated heating system that quickly heats the sock and retains that heat for several hours, so you have more time to go exploring while snowshoeing.
Layered Clothes
An essential practice when it comes to dressing well for snowshoeing is layering. Wearing layered clothes allows you to adjust for changes in temperature and the weather. For example, when conditions get warmer, you can take off layers, and when it gets colder, you can put on more layers instead.
There are three main layers to consider when dressing for snowshoeing: the base, middle, and outer layers. The base layer is the innermost layer and directly touches your skin. As such, the material this layer is made of must be able to wick away sweat quickly and dry fast, like merino wool and synthetic.
Crew necks or quarter zips are suitable for the top as they allow you to vent in warmer weather, while you can go with long johns or winter tights for the bottom.
The primary function of the middle layer is to provide insulation and warmth, so you should choose a material such as fleece, wool, or synthetic. These material types also allow sweat wicked away by the base layer to continue moving away from your body.
Fleece or puffy jackets are excellent choices for your top part. And while the bottom middle layer is often skipped, you can opt to wear fleece pants as long as the weather isn’t too warm.
The outer layer protects you from the elements, including wind, snow, and rain. Therefore, you should choose materials that are highly durable and resistant to abrasions and tears, fully waterproof, windproof, and highly breathable. The most common outer layers for the top are hardshell jackets and hardshell pants for the bottom, especially ones made of Gore-Tex.
Gore-Tex is specially made to withstand harsh weather conditions and is a perfect outer layer for snowshoeing. Jackets that come with pit zips for venting are also handy as they allow you to vent when it gets too warm.
And, similar to snowshoeing socks, avoid cotton material because they absorb moisture, which can be a nuisance whether in high or low-temperature conditions.
Hats, Gloves, and Other Coverings
Aside from layered clothing, it is also essential to have coverings for the parts of your body where you might have significant heat loss, like your head and hands. Gloves and hats are excellent in this regard.
For gloves, synthetic or wool are the best material, though waterproof and insulated types are acceptable. You can wear glove liners under your gloves if you want extra insulation. You can also wear only the liners for warmer weather.
For hats, synthetic or wool are also best, but you can also go with windproof and waterproof types. Ball caps or brim hats are possible alternatives for sunnier conditions as they can also help protect your eyes from UV rays. Polarized sunglasses also help protect your eyes as well.
For covering your face and neck area, you can go with balaclavas, as they also provide coverage for your head and neck. Neck gaiters also work as both insulating material and protection from the elements.
Snowshoeing Gaiters
Snowshoeing gaiters can be very useful, as they help to keep snow and other debris out of your winter boots, especially in deep powder. Gaiters also provide extra waterproofing to keep your boots dry and give protection from abrasion when you brush against bushes and other rough terrain features. Choose gaiters made of highly durable, waterproof, and windproof material – such as Gore-Tex – and have an intuitive binding system.
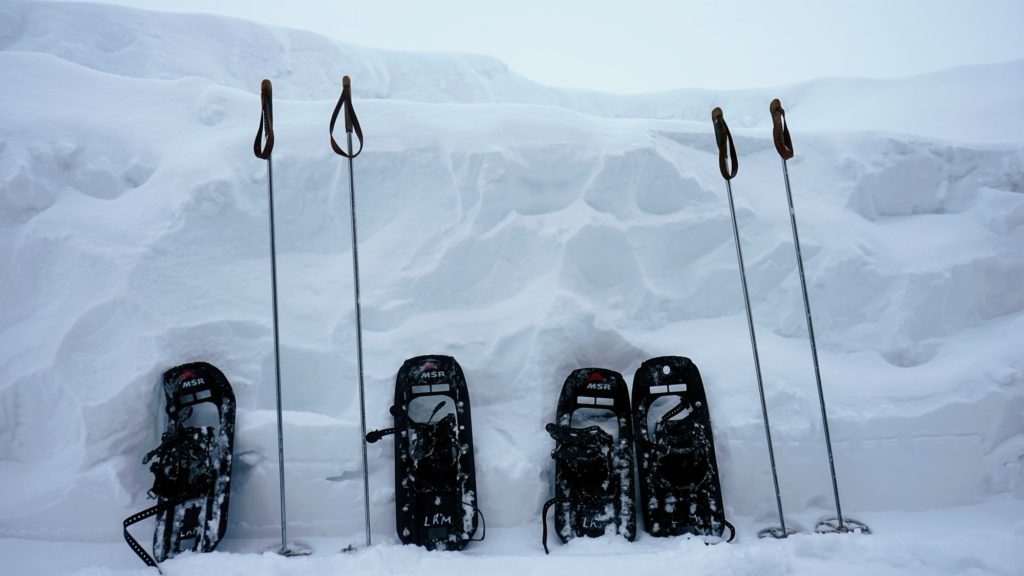
Trekking Poles
In general, trekking poles are considered optional equipment for activities such as hiking. But for snowshoeing, poles are a significant help. Trekking or ski poles help you keep your balance on soft powder and can also be used to probe for potential hazards.
Baskets are an essential feature of ski poles as they help keep the poles from sinking into the snow. The larger the baskets, the better the flotation. It is also better if your trekking poles are the adjustable type, so you can change the length to a shorter size for going uphill or make the poles longer when you go downhill. If you want pole ends that provide excellent traction for slippery surfaces, you can use carbide or steel tips.
The Ten Essentials
The Ten Essentials are a set of equipment grouped into ten systems that help you prepare for any emergency you might encounter in whatever outdoor activity you’re engaged in. The following is a list of these ten systems, along with some of their included items:
- Navigation – consists of a map (topographical, relief), compass, GPS
- Sun protection – sunglasses, sunscreen, hat
- Insulation – jacket, rain shell, extra clothing
- Illumination – flashlight, headlamp, extra batteries
- First-aid supplies – first-aid kit
- Fire – matches, lighter, tinder
- Repair kit and tools – knife, scissors, duct tape, screwdriver
- Nutrition – food
- Hydration – water, water treatment supplies
- Emergency shelter – tent, tarp, space blanket, bivy sack
An extra piece of equipment to bring with you when snowshoeing is an avalanche safety kit which includes a personal locator beacon (PLB), probe, and shovel.
Make sure to study how to use all of the above gear, especially your navigation equipment, so that they can be helpful to you when the need arises.
How to Snowshoe
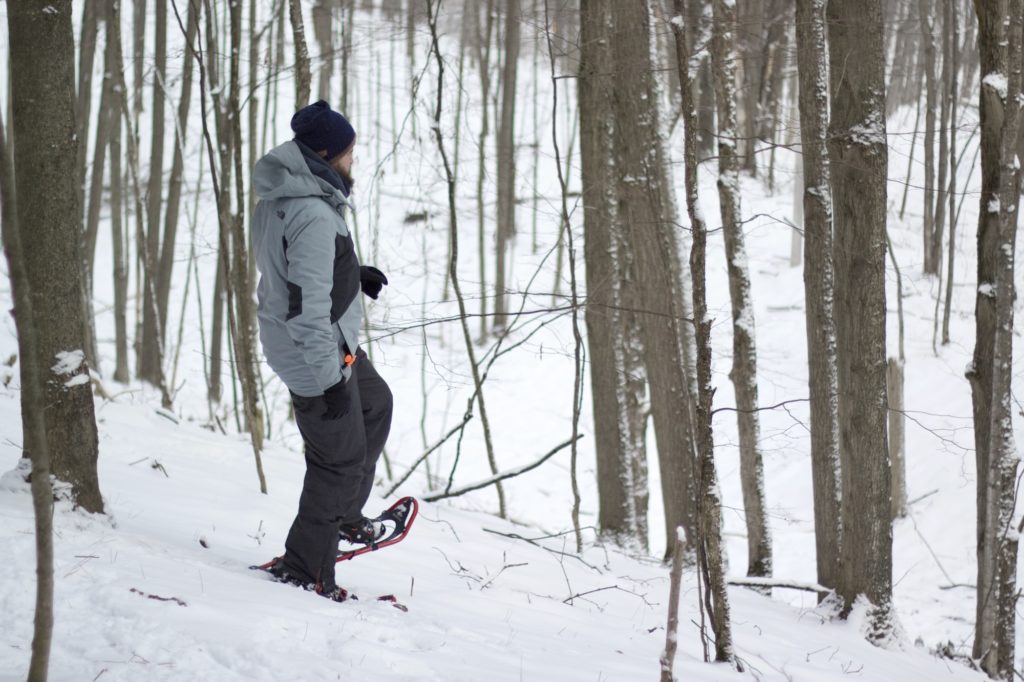
Snowshoeing on Flat Terrain
Snowshoeing on flat ground is the most straightforward technique to learn. However, it can be challenging in the beginning because of the adjustments you’ll be making.
Unlike hiking, where you wear hiking boots, snowshoeing uses snowshoes that are much larger in comparison. As such, you will have to make your stance wider than usual, so you don’t step on your other snowshoe, and doing this can cause discomfort to your hip and groin muscles at first. You should also make sure to lift your feet higher than usual, so you don’t get in the way of your other snowshoe and accidentally trip.
After snowshoeing the first couple of times, though, you should get used to these new adjustments you made.
Snowshoeing Uphill
There are various ways to snowshoe uphill, depending on how packed the snow is. The process is more straightforward for hard-packed powder. You can rely on the crampons at the bottom of your snowshoes to provide traction on the snow while you continue moving upward. For soft snow, however, moving forward may not be quite as simple.
There is a bit more to consider before you step forward in soft powder. Because the snow is not as hard-packed, your foot might sink further into the snow when you try to transfer your weight on it while moving your other foot forward. Fortunately, there are a couple of techniques you can use to avoid this predicament.
One technique you can use is the kick-step technique. For each step, use the toe of your snowshoes to pound out the snow three or four times. In doing so, you can get a solid base so you can transfer your weight safely as you climb uphill. Otherwise, the surface you step on might collapse, and you could end up going backward instead.
Another method you can do is doing a duck walk. It has the same principles as the kick-step technique and provides a bit more stability when moving upward.
For steeper slopes, make sure to use the heel lifts of your snowshoes. Heel lifts reduce calf fatigue and make climbing much less straining, so you can keep going uphill, especially if it’s a relatively long climb.
Snowshoeing Downhill
When going downhill, make sure to keep your body upright or leaning slightly back, so you don’t lose your balance; you can also bend your knees a little bit. Lift your foot high as you move forward, planting the heel part of your snowshoes first for stability. Make sure to keep your weight on your uphill snowshoe.
For soft powder, you can also use the kick-step technique. You don’t have to rush going down – you can take it slow. You can use your trekking poles to help you keep your balance. If you start to slip, sit down right away so that you don’t keep on sliding.
Traversing/Side-hilling
Traversing or side-hilling is done so you can avoid having to climb steeper slopes or complicated terrain. For hard-packed surfaces, you can rely on the crampons of your snowshoes to provide traction as you traverse. For softer powder, pound out the snow in front of you with the toe part of your snowshoes to create a ridge you can use to move forward. You can use your hiking poles to help keep your balance.
Tips for Snowshoeing
Search for a suitable location where you can go snowshoeing.
You can snowshoe virtually anywhere there is snow on the ground. Still, some places are better suited for such winter activities.
You can go to local or well-known hiking trails, for example. You can also visit any local, provincial, or national parks and forests – make sure to check first if the location you choose allows snowshoeing. You can even go to ski resorts or cross-country areas, although these places usually charge fees for the use of their trail systems.
It is best to always research the weather conditions of the location you are headed to and the terrain before going out. That way, you know what you can expect so you can be well-prepared. Make sure to also have with you your navigation equipment, such as a map, compass, and GPS, to keep track of where you are. It is also best to tell someone where you’re going for safety measures.
Practice snowshoeing on flat terrain first.
You’ll want to get used to the feel of snowshoeing before trying out more straining activities like climbing uphill or downhill. Practicing on flat terrain is best for this as you can more easily adjust for the needed wider stance, for example.
Follow in the tracks of other snowshoers when possible.
It can be tiring to keep on pounding into the snow to get a proper foothold. So when someone has already done the job for you, you can step into the tracks they already made to save energy.
Therefore, it would also be best for you to go snowshoeing in a group, as you can take turns with people taking the lead and breaking through the snow.
Bring enough food and water.
Snowshoeing is much more strenuous than simply walking or even hiking, made more challenging because of the snow factor. Because you’ll be using more energy and tiring more in comparison, it is essential to bring adequate food and water to last you the entire snowshoeing trip.
Practice snowshoeing safety.
The following are some snowshoeing safety tips to keep in mind:
- Make sure your pack always contains the Ten Essentials so that you can be prepared for any emergency.
- Be aware of the potential hazards you might encounter when snowshoeing, such as tree wells, water crossings, steep slopes, and avalanche areas. Also, research beforehand if your snowshoeing location is prone to any such hazards. If your site is prone to avalanches, you might want to prepare an avalanche safety kit.
- If you are at a ski resort, stick close to groomed trails so that you are less at risk from avalanches and are closer to potential help. Otherwise, make sure you have your navigation equipment with you, that you know how to use them, and that someone knows of your snowshoeing plans. Also, try to avoid snowshoeing on your own when possible.
- Make sure to drink regularly and eat some snacks. Not only does snowshoeing take up a lot of energy, but it can also be a cause of dehydration. Cold weather conditions affect the body’s ability to detect thirst, so it is essential to take in water regularly.
FAQs
Is snowshoeing easier than hiking?
In terms of learning the activity itself, snowshoeing is relatively easy. The way you have to move your body is similar to walking or hiking. The main difference is that your stance has to be wider in comparison, so you don’t step on your snowshoes. You also have to lift your legs higher to go over soft powder.
If you mean easier in the physical sense, then snowshoeing can be a bit more challenging than hiking. Because you are going through the snow, which can be deep at times, you will end up having to use more energy to move forward. But with the proper technique, you can reduce the amount of effort needed and make things easier on you.
Is there a technique for snowshoeing?
There are a couple of techniques that can help when snowshoeing uphill or downhill. When going uphill, you can use the kick-step method so you can comfortably transfer your weight from one foot to the other while keeping yourself stable. You can also do a duck walk for increased stability. A tip for climbing steeper slopes is to use the heel lifts of your snowshoes: they help reduce calf fatigue which makes climbing easier.
For snowshoeing downhill, you can also use the kick-step technique. Just make sure not to rush going down and take it slow. You can also use your trekking poles to help keep your balance.
Is snowshoeing good exercise?
Snowshoeing is an excellent exercise for your whole body. It helps build muscle, especially the lower parts such as your thighs and calves, and also gives your heart and lungs a workout, which strengthens and develops them. Furthermore, snowshoeing can help you lose weight as you can burn 500 to 1000 calories per hour moving through the snow.
Conclusion
We hope that the article helped you learn more about what snowshoeing can be like and maybe got you excited to try it. Making the proper preparations beforehand and being informed of what you can expect can seem like a hassle at first. But in the end, following these steps will surely pay off when you start snowshoeing. And with a few techniques and tips, we are confident that you will be as ready as can be to enjoy your first snowshoeing experience.